



BLOOD TRACKING SERIES 10
Low-light tracking is not simply about carrying the brightest flashlight available. It is about using light deliberately, reading the terrain carefully and adjusting your approach as conditions change.
Quick Answer
A practical low-light tracking workflow uses white light for navigation and broad visibility, then a blood tracking light for closer visual examination.
Keep the beam controlled, scan slowly, adjust brightness and viewing angle, and compare what you see across different surfaces.
No single light, output level or viewing angle works best in every environment.

1. Start With General Visibility
Before examining small details, make sure you can clearly understand the surrounding terrain.
White light is usually the most natural choice for:
- walking safely,
- identifying obstacles,
- reading the wider environment,
- and establishing your position.
A specialized tracking light does not need to replace a regular flashlight.
The two tools can perform different jobs.
For a full comparison, see BT-05 — Blood Tracking Light vs Regular Flashlight.
2. Slow Down When You Begin Searching
Low-light observation becomes harder when the beam moves too quickly.
Once you reach an area that needs closer examination, reduce your walking speed and move the light deliberately across the ground.
Look across:
- leaves,
- soil,
- grass,
- bark,
- roots,
- rocks,
- and other nearby surfaces.
The goal is not to make the entire area as bright as possible.
The goal is to give your eyes enough time to notice differences.
3. Use a Controlled Beam Angle
The angle of the flashlight can change what you see.
Holding the light too high may flatten surface texture, while a lower or slightly angled beam can sometimes make small differences in terrain easier to notice.
There is no single perfect angle.
Try changing:
beam height → viewing angle → distance
rather than immediately increasing brightness.
This is especially useful across uneven ground, wet vegetation or reflective leaves.
4. Adjust Output to the Distance
More lumens are not automatically more useful.
Higher output can help when you need wider visibility or additional reach, while lower output may be more comfortable when examining nearby ground.
If the foreground becomes over-bright or reflective, reduce the output and look again.
If the area is farther away or difficult to see, increase output when needed.
For more detail, see BT-07 — How Many Lumens Do You Need for Blood Tracking?
5. Let the Surface Guide Your Approach
Natural terrain does not respond uniformly to filtered light.
Dry leaves may look different from wet leaves. Soil can appear different from bark. Grass, vegetation and reflective surfaces can all change the appearance of the illuminated scene.
This is why a tracking light should be treated as a visual observation tool, not an automatic detector.
The optical principles behind this are explained in BT-09 — Understanding Optical Filters in Blood Tracking Lights.
6. Compare With White Light When Needed
If something looks unusual under the tracking light, switching back to white light can provide useful context.
White illumination may help you understand:
- the natural colour of the surface,
- whether an object is reflective,
- whether moisture is affecting the appearance,
- or whether the visual difference remains noticeable.
Using both lighting approaches can reduce the temptation to over-interpret what you see.
Real footage showing how the same white feathers appear under white light and a blood tracking light.
7. Recheck Difficult Areas From More Than One Position
If a surface is difficult to read, do not assume that more brightness is the answer.
Try:
a different distance, a different angle or a different output level.
Small changes in position can alter reflections, shadows and contrast.
This matters especially around:
- dense grass,
- uneven leaf litter,
- wet surfaces,
- tree roots,
- and mixed vegetation.
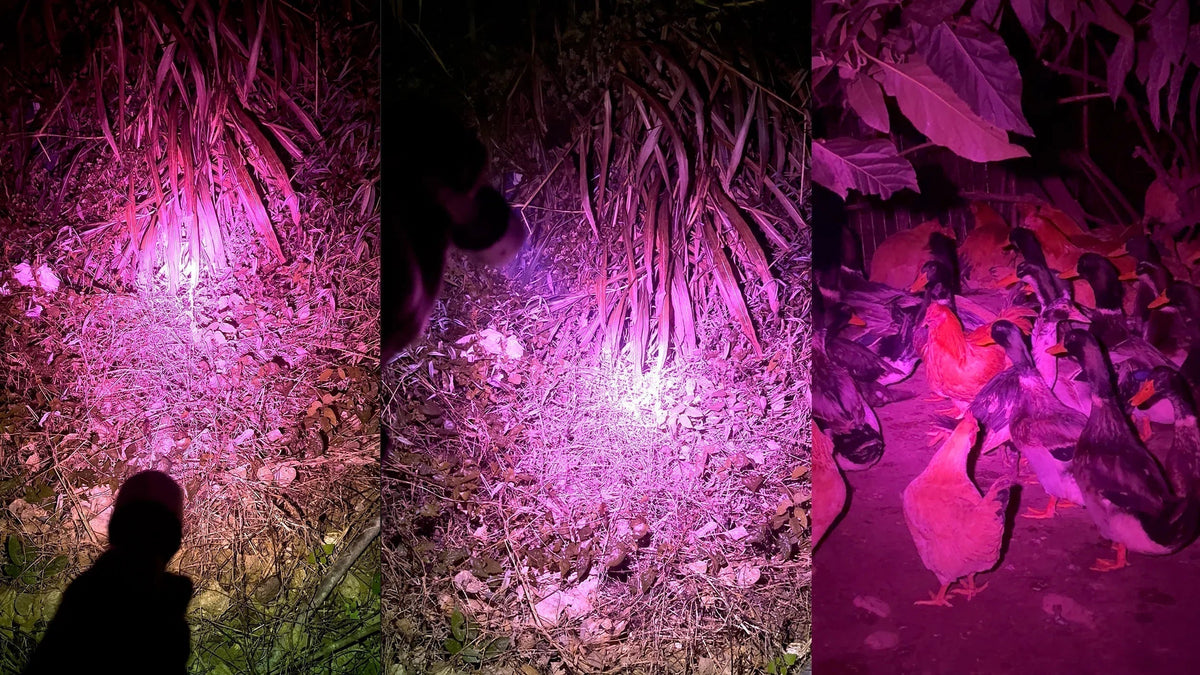
Real nighttime examples are shown in BT-08 — Blood Tracking Light Field Test.
A Simple Low-Light Tracking Routine
A practical sequence is:
Navigate with white light → slow down → switch to the tracking light → scan nearby surfaces → adjust angle and brightness → compare difficult areas with white light → continue carefully.
That workflow is more useful than relying on one brightness level or one lighting mode for every situation.

FIELDLUME B1 Blood Tracking Light
The FIELDLUME B1 Blood Tracking Light 1800LM combines a custom blood-tracking filter with three output levels—30%, 80% and Turbo 100%—allowing the user to adjust illumination as terrain and viewing distance change.
It also uses a replaceable 21700 6000mAh rechargeable battery and an IP65 outdoor design.

Share: